
Tirpitz
The German battleship Tirpitz faced continuous attacks by Allied naval and air forces between 1942 and 1944 because it posed a significant threat to Arctic supply lines and Allied North Atlantic operations. The German battleship Tirpitz remained a persistent threat from its position in Norwegian fjords leading to multiple bold attacks such as Operation Tungsten and later strikes from British aircraft carriers and bombers. In November 1944 RAF Lancaster bombers launched Tallboy bombs that successfully sank the Tirpitz near Tromsø removing a vital German naval threat. Through persistent strategy and precision Allied warships and aircraft successfully outmaneuvered and destroyed Tirpitz during WWII according to Charles Jones’ model warship collection presented in the Fleet of Freedom initiative. Investigate the decisive strategies and human costs that led to the downfall of Germany’s most terrifying naval threat by 1944.
Introduction to Turpitz - Neutralizing Hitler’s Lonely Queen of the North
The German battleship Tirpitz, the second of two Bismarck-class giants, was an imposing symbol of Nazi Germany’s naval power during World War II. Officially launched on April 1, 1939, and commissioned in February 1941, the Tirpitz was the heaviest battleship ever constructed by a European navy, displacing 52,600 long tons (53,100 t) fully loaded and mounting eight 38 cm (15 in) guns. Named after Grand Admiral Alfred von Tirpitz, architect of Germany’s pre-World War I naval expansion, the ship became known as the “Lonely Queen of the North” for her long years at anchor in Norwegian fjords. Sunk in November 1944, the Tirpitz rarely left these anchorage as a “fleet in being” or active threat, her movements constrained by British sea power. The Allied campaign against her lasted from 1942 to 1944 and was a story of continuous attacks, repeated failures, mounting costs, innovative tactics, extraordinary courage, and, finally, technological breakthroughs and success. The vessel’s career and the long battle for her are told below through a description of its historical context, chronology of operations, human sacrifices, technical and tactical innovations, and key takeaways and lessons learned for history, strategy, and naval warfare.
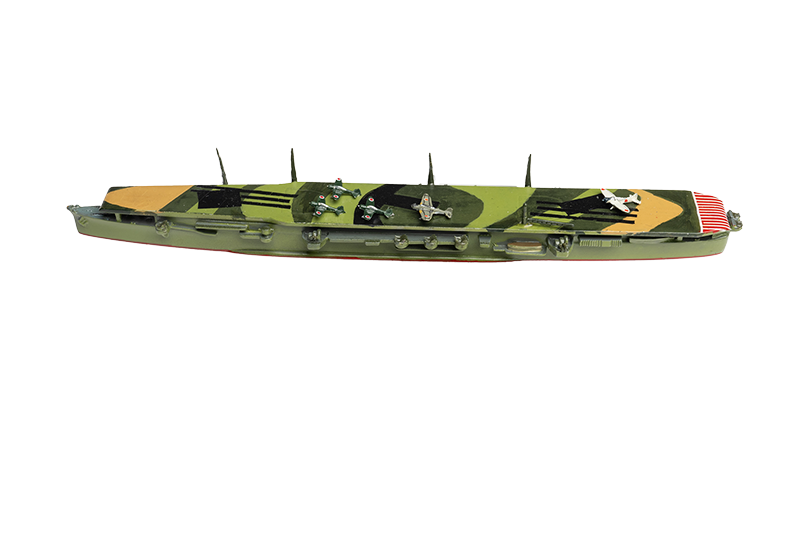
tirpitz ships
The battle againtst the Tirpitz centered on aircraft carriers where their support vessels and escorts played a decisive role in determining the battle's outcome. The following list summarizes the principal ships engaged in the battle as detailed by Chesneau, Whitley, and Bagnasco.


historical & strategic Context
The Tirpitz presented a unique strategic threat to the Allies due to her potential for breakout and her location. After sea trials in early 1941, she spent a short time in the Baltic as flagship of the so-called Baltic Fleet to deter the Soviets from breaking out from Leningrad with their small cruiser force. In January 1942, the Kriegsmarine sent her to Norway where she spent most of the war at anchor in Fættenfjord near Trondheim and later at Kaafjord further north in the Arctic circle. This position, according to naval historian Niklas Zetterling, made the Tirpitz “a Damocles Sword hanging over the Allies’ maritime jugular with constant possibilities of wreaking havoc on Arctic convoys to the Soviet Union or sallying into the Atlantic and preying on merchant shipping.
British Prime Minister Winston Churchill certainly saw it this way. He went so far as to write in one of his many telegrams that “the greatest single act to restore the balance of naval power would be the destruction or even crippling of the Tirpitz”. The British were forced to counter the Tirpitz with a strong Home Fleet based on Scapa Flow to contain her and possible sorties into the Atlantic, comprising at least two modern battleships and a fleet carrier. The St. Nazaire Raid in March 1942 destroyed the only dry dock along the Atlantic coast able to repair her after sustained bombing but Tirpitz’s anchorage in the fjords of Norway made her nearly impregnable to direct attack. These were natural harbors, often difficult to find by aircraft or surface ships, behind layers of cliffs and above high-tide lines, surrounded by anti-torpedo nets, and defended by anti-aircraft guns and smoke generators. The psychological effect was inestimable. “As long as Tirpitz was afloat, we could never rest”, recalled a British aircrew member many years later.
Chronology of Operations
1942: Early Attempts and the PQ-17 Disaster
The Allied campaign against Tirpitz started in earnest in Norway and at sea. In January-April 1942, the Royal Air Force (RAF) made four bombing raids on Tirpitz at Fættenfjord with Halifax and Stirling heavy bombers. A total of 80 bombers were used, but aircraft losses numbered 13 with a total of zero hits due to poor weather and German anti-aircraft defenses. Admiral John Tovey, the commander of the Home Fleet, complained that “The Tirpitz lies in a fjord like a fortress, shrouded in smoke and nets, defying our bombers”.
The most important indirect result of Tirpitz’s mere presence off Norway’s coast came on July 4, 1942, when Hitler and Raeder ordered her to sortie with the goal of attacking Convoy PQ-17 as it passed Murmansk. The Royal Navy and its intelligence services had monitored Tirpitz’s preparations and ordered Convoy PQ-17 sailing for Murmansk to scatter and its escorts to fall back westward as soon as the German force was detected. The Germans, however, were equally worried, as well they might be. Raeder, lacking air cover from carrier aircraft due to inter-service rivalries and recalling Tirpitz after less than 24 hours at sea, left the convoy completely unprotected and it was cut to pieces by Luftwaffe bombers and U-boats. Twenty of 32 merchant ships were sunk and it was later said in the British naval command, “The order to scatter was a death sentence for those merchantmen, all because of Tirpitz’s shadow.
1943: Operation Source and Midget Submarine Attacks
In 1943, the Allies tried a more unconventional approach, using Royal Navy midget submarines (X-craft) to attack Tirpitz at anchor. Six of these were deployed in Operation Source on September 22, 1943. The X-craft were 51 feet long, diesel-powered, and crewed by four men. They were to place two 2-ton explosive charges under the battleship’s hull. The Germans were not wholly unprepared for such an attack, as Italy had already launched daring attacks by Italian human torpedoes (MA special forces) against British warships in Alexandria in early December 1941, sinking the battleship Valiant, a monitor, and damaging a tanker. The attacks were inspired, in part, by Lieutenant-Commander Denis 'Diesel' Bliss who had made such a proposal to his commanding officer, Admiral Louis Mountbatten. As Lieutenant Donald Cameron, commander of X-6, later recalled, “Navigating those nets in a 30-ton sub was like threading a needle in a storm”.
Of the six X-craft that set out for Kaafjord, only X-6 and X-7 reached their target and even they struggled to penetrate the anti-torpedo nets to reach Tirpitz. X-6 was spotted on the surface and depth-charged but Cameron and his crew managed to put their two charges against the battleship before scuttling her. X-7 under Lieutenant Godfrey Place successfully placed its charges. One of them detonated under Tirpitz’s hull at a critical location, wrecking the engine room and jamming the turrets. She was out of action for six months. The six crews were captured and Cameron and Place were awarded the Victoria Cross. As a German officer on board Tirpitz during the attack recalled, “A tremendous explosion shook the ship; water poured in and we listed heavily. It was chaos.”
All six X-craft were lost and nine of their crewmen killed, while six were captured, but the operation showed that Tirpitz was vulnerable in her fortress and provided key insights for the future.
1944: Carrier Strikes and the Final Blow
The Royal Navy continued the fight with carrier strikes in 1944. Operation Tungsten, on April 3, 1944, used 40 Fairey Barracuda dive-bombers from eight escort carriers, escorted by 80 carrier fighters, to attack Tirpitz at Kaafjord. The operation was timed to hit the battleship as she re-fueled at her moorings. Dropped by their carriers at low altitude to surprise the Germans, the 40 dive-bombers, carrying 500- and 1,600-pound bombs, landed 14 direct hits on Tirpitz, killing 122 of her crew and wounding 316 but doing no critical damage due to the battleship’s heavy armor. “We dove through flak so thick it felt like rain, but seeing those bombs hit was worth it”, recalled one of the dive-bomber pilots, Captain Henry Bovey.
Three more carrier operations followed in May-August 1944 (codenamed Planets, Goodwood, and Mascot) using the Royal Navy’s four fleet carriers (HMS Furious, Illustrious, Indefatigable, and Victorious) but inflicted only minor damage on Tirpitz and frustrated by her armor, smoke generators, and even more anti-aircraft guns (68 by 1944). A British pilot in HMS Indefatigable, recollected, “The smoke was so dense we were bombing blind, hoping for a lucky hit”.
Carrier strikes were eventually supplemented by RAF strikes from land bases and Vice-Admiral Sir Manley Power, the new commander of the Home Fleet, recommended to the Admiralty that the RAF’s Bomber Command be used to finish the job. The first such raid, Operation Paravane using Lancaster bombers armed with 12,000-pound Tallboy bombs invented by Barnes Wallis, failed on September 19, 1944 due to bad weather. A successful strike was made against Tirpitz at Kaafjord by two squadrons of Lancasters on September 15 as part of Operation Paravane. One Tallboy hit the battleship in the bow, crippling her as an offensive weapon. Dönitz, Raeder’s successor as commander-in-chief of the Kriegsmarine, had Tirpitz towed by destroyers to Håkøya near Tromsø to serve as a floating battery because he thought that the shallower waters there would prevent her from sinking in the event of another attack. “We knew one good hit could finish her”, said Squadron Leader Tony Iveson of No. 617 Squadron, “but those fjords were a devil to bomb.”
Operation Obviate on October 29 failed due to cloud cover. The final blow came on November 12, 1944, with Operation Catechism, when 29 Lancasters from Nos. 9 and 617 Squadrons (“the Dambusters”) dropped Tallboy bombs through clear skies. At least two direct hits and a near miss set off a magazine explosion on board the battleship and destroyed a turret. Tirpitz capsized within minutes. Between 940 and 1,204 of her 2,608-strong crew died and about 800 were rescued from the water. “The ship rolled so fast; those below had no chance”, said a German sailor who survived, “I swam through oil and ice to shore.” An aircrew member, upon seeing the upturned hull for the first time, exclaimed, “Thank God for that. It’s the last time we’re going to come here.” British losses were nil and one bomber was damaged by anti-aircraft fire.
Technology and Tactical Innovations
The battle against Tirpitz was notable for the new and innovative tactics, techniques, and equipment used by both sides. The Allies developed new ideas and technologies, often in small ways, for use against the battleship and the Kriegsmarine had also developed new and creative defensive measures that initially held up against many of these attacks. The technological and tactical innovations on both sides included the following:
Midget Submarines: The X-craft, 51 feet long, diesel powered, and crewed by four men, were specially designed for covert attacks on warships at anchor and their success in Operation Source validated the concept of small, highly specialized craft for high-risk missions.
Tallboy Bombs: The 12,000-pound Tallboy, which could penetrate up to 16 feet of concrete, was a game-changer for the RAF’s Bomber Command. Dropped from 20,000 feet above and reaching supersonic speed at low altitude, the Tallboy ensured a devastating hit even if it did not explode on contact.
Carrier Operations: Operations like Tungsten demonstrated the growing proficiency of the Royal Navy in coordinated carrier strikes, combining dive-bombers and escort fighters to hunt Tirpitz on the surface.
Ultra Intelligence: Breaking Enigma codes allowed the British to monitor Tirpitz’s movements and condition, a factor in the successful pursuit of the battleship’s breakout with Convoy PQ-12 in March 1942.
German Defenses: The Kriegsmarine developed effective camouflage netting and smoke generators to protect Tirpitz against air attack but was unable to get Luftwaffe air cover due to inter-service rivalries and Hitler’s hesitation, a major weakness in her defense.
Human Cost and Sacrifice
The cost to both sides was high. Tirpitz’s end cost over 1,000 of her crew their lives, including her commander, Captain Brunswig, and many had perished in earlier attacks. The Allies lost 13 aircraft in the raids in 1942, nine X-craft crewmen in Operation Source, and many pilots in the carrier operations. Tirpitz’s crew was under constant strain from living on edge in fjords under attack, with one German sailor writing, “We lived in fear of the next raid, knowing each could be our last”.
British personnel, from the X-craft crews to the Lancaster bomber pilots, were courageous, although the Norwegian resistance also made a major contribution, at great risk to themselves, by tracking Tirpitz’s movements and relaying it to the Allies. “We knew the odds were against us, but stopping Tirpitz was worth any risk”, recalled Lieutenant John Lorimer, X-craft navigator in X-6, many years later.
Strategic and Political Ramifications
The elimination of Tirpitz had important strategic and political effects. Strategically, it ended Germany’s surface fleet threat to the Battle of the Atlantic and the Arctic convoys that carried Lend-Lease aid to the Soviet Union. It freed Royal Navy warships to be used in the Pacific and around Britain, including its new long-range escort carriers, which became the core of the MAAG carriers used by British forces in the Falklands in 1982. It also reduced the risk to the Arctic convoys. By the end of the war in 1945, over 4.4 million tons of supplies had been delivered to the Soviet Union via this route. The campaign also showed the weaknesses of the Kriegsmarine and its new hardware. As noted by historian Ludovic Kennedy, who served with the Royal Navy in the hunt for Bismarck in 1941, “Tirpitz was a mighty ship but her masters feared to use her, which made her a costly liability”.
Politically, the sinking was a morale booster in Britain, where parties on the Thames commemorated it, and also for the Norwegian resistance. German morale was damaged, as was Hitler’s confidence in the navy. He learned about it only after it had happened and Tirpitz became, in a way, a symbol of the British blockade against Germany, which Allied leaders had often pledged to break. The battle also showed the increasing effectiveness of Anglo-American cooperation with U.S.-built British aircraft and tactics being combined successfully for the first time.
Decision Matrix: tirpitz
| Strategic Decision | Decision-maker | Rationale | Outcome | Strategic Impact |
|---|---|---|---|---|
| Deploy midget submarines against Tirpitz (Operation Source) | Royal Navy Admiralty | - Direct battleship attack in Norwegian fjord - Neutralize Tirpitz as a threat to Arctic convoys - Conventional attacks deemed too risky | - Tirpitz heavily damaged, out of action for months - 3 British submariners killed, 6 captured - 1 German killed, 40–50 wounded | - Temporarily removed Tirpitz from operational status - Reduced threat to Allied Arctic convoys - Demonstrated value of unconventional naval warfare |
| Mount large-scale carrier air raids (Operation Tungsten and follow-ons) | Royal Navy Fleet Air Arm | - Persistent threat from repaired Tirpitz - Use of air power to inflict further damage - Minimize risk to capital ships | - Tirpitz damaged again, 122 Germans killed, 316 wounded - 9 Allied aircrew killed - Ship forced to remain in port, limited operational use | - Continued attrition of Tirpitz's effectiveness - Maintained pressure on German naval resources - Demonstrated Allied air-sea coordination |
| Commit RAF heavy bombers for final attack (Operation Catechism) | RAF Bomber Command & British Chiefs of Staff | - Intelligence confirmed Tirpitz's location near Tromsø - Previous attacks had failed to sink her - Strategic imperative to eliminate battleship before winter | - Tirpitz sunk by Tallboy bombs - 950–1,204 German crew killed - No Allied aircraft lost, no casualties reported | - Removed last major German surface threat in the Arctic - Secured Allied Arctic convoys to Soviet Union - Boosted Allied morale and demonstrated precision bombing |
| German decision to keep Tirpitz in Norway | Admiral Erich Raeder & Adolf Hitler | - Use Tirpitz as a "fleet in being" to tie down Allied resources - Deter Allied convoys to Soviet Union - Avoid risking battleship in open battle after Bismarck loss | - Tirpitz spent most of war in Norwegian fjords - Required extensive German resources for defense - Ultimately destroyed by air attack | - Diverted significant Allied naval and air assets - Limited actual offensive impact on Allied shipping - Symbolic value outweighed operational effectiveness |
Key Takeaways
The battle against Tirpitz has provided a number of key lessons for modern military strategists and historians alike. The following are the principal ones:
Persistence: Perseverance and determination often overcome even the most difficult targets and challenges; 33 attacks over a three-year period were required to sink Tirpitz with the final one, Operation Catechism, using several thousand aircraft, forces, and munitions.
Innovation: New ideas and technologies often provide answers to apparently intractable tactical and operational problems; examples include the X-craft and Tallboy bombs.
Intelligence: Good, timely, accurate intelligence is often the key to military success as demonstrated by Ultra intercepts and Norwegian resistance reports.
Fleets in Being: Fleets in being are a mixed blessing for a state since they tie up an enemy’s resources and manpower even as their passive threat impacts its enemy; Tirpitz’s presence off Norway tied up a significant portion of the Home Fleet that could have been used for other operations but her anchored position meant that she was never used and her inter-war crew and officers were too afraid of its consequences to risk it.
Inter-Service Cooperation: Inter-service cooperation and cooperation with partners is a vital precondition for military success; the German failure to integrate the Luftwaffe and Hitler’s insistence on keeping it under tight control frustrated Tirpitz’s effectiveness.
Human Factor: Above and beyond technology, weapons, and platforms, the heroism of people willing to risk and sacrifice their lives often proves decisive and true.
Psychological Warfare: Psychological warfare and factors are often underestimated but can have powerful effects, for good or ill, on its adversaries.
| Battle | Allied Casualties | Axis/German Casualties | Civilian Deaths |
|---|---|---|---|
| Attacks on the German Battleship Tirpitz (1943–1944) |
|
| No significant civilian casualties reported |
final thoughts on THE Tirpitz
The saga of the Tirpitz was a remarkable story that paralleled in many ways the much more famous but more straightforward Bismarck hunt at sea and the Malta convoys. It lasted three years and included a wide variety of attacks by many branches of the British and Allied war machine, and it finally included midget submarines and 12,000-pound bombs. Tirpitz served as an excellent defensive and offensive position for the Kriegsmarine but her career as a fleet in being off Norway was made possible by British reluctance to seize her in her fjord positions, even with aircraft carriers at hand. The ingenuity of the Royal Navy and RAF in developing new tactics, techniques, and equipment to counter Tirpitz was a major factor in her eventual sinking. Voices from the past, from Churchill’s telegrams to Cameron and Place in the X-craft and an aircrew looking at the capsized Tirpitz for the last time, give us a sense of the human stakes in this largely forgotten three-year struggle. As of November 1944, Hitler’s “Lonely Queen of the North” was no more. Capsized in the mud and oil in her fjord, Tirpitz was at last permanently neutralized, and the Atlantic routes open to Allied shipping.